The Best Piroshki Recipe Ever

When I first set out to recreate the perfect piroshki, I knew it had to be something truly memorable. Growing up with the warm smell of baking bread and sizzling fillings wafting through our kitchen, piroshki always meant comfort and love. Now, sharing this recipe with you feels like passing on a treasured secret that has brought my family countless moments of joy.
I spent days testing doughs, perfecting the golden crust, and crafting fillings that strike the perfect balance between hearty and flavorful. What I love most about this recipe is how versatile and forgiving it is — you can fill these pillowy buns with almost anything you crave. Whether served as a snack, a side, or the star of dinner, these piroshki never fail to impress.
As someone who’s written countless recipes, I have to say this one holds a special place in my heart. There’s nothing like biting into a freshly baked piroshki, warm and fragrant, to make you feel instantly at home. If you loved my Marry Me Chicken Pasta or my Creamy Garlic Chicken Breasts, you’re going to adore these piroshki just as much.

Why You’ll Love This Piroshki Recipe
This recipe delivers soft, fluffy dough and savory, satisfying fillings every single time. It’s approachable for beginners yet impressive enough to serve at a gathering. You’ll love how customizable it is — swap in your favorite meats, cheeses, or even sweet fillings for a twist. Plus, they freeze beautifully, so you can always have a stash ready for when you need them most.
Ingredients
Every ingredient here plays an important role in making these piroshki unforgettable. The all-purpose flour forms the foundation of our soft, elastic dough. Yeast is essential for that beautiful rise and airy texture. A bit of sugar not only feeds the yeast but also adds a subtle sweetness to the dough. Salt enhances all the flavors and brings balance. Whole milk enriches the dough, making it tender and flavorful, while butter gives it richness. Eggs add structure and color to the finished buns.
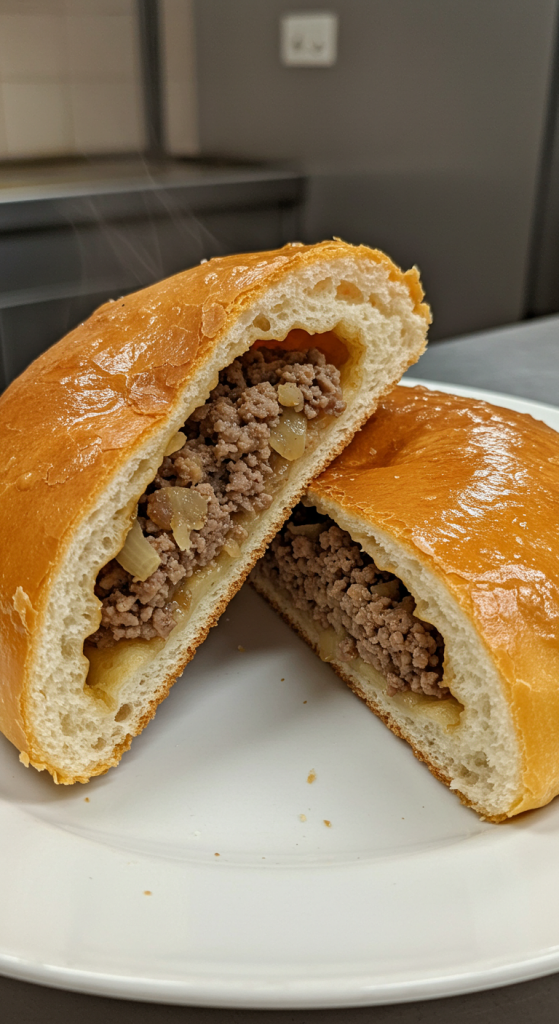
For the filling, I usually go with ground beef for its hearty, satisfying flavor. Onion lends sweetness and depth to the mix. I also add a touch of garlic for warmth, and black pepper for a hint of spice. Everything comes together in a savory, juicy filling that perfectly complements the fluffy dough.
How to Make The Best Piroshki Ever
Step 1: Prepare the Dough
In a bowl, combine warm milk, sugar, and yeast. Let it sit until it’s foamy. Mix in eggs, melted butter, and salt, then gradually add flour until a soft dough forms. Knead the dough for about 8-10 minutes until smooth and elastic. Cover and let it rise in a warm place until doubled in size.
Step 2: Make the Filling
While the dough rises, cook the ground beef in a skillet over medium heat. Add chopped onion and garlic, and cook until everything is tender and fragrant. Season with salt and black pepper, then set aside to cool.
Step 3: Assemble the Piroshki
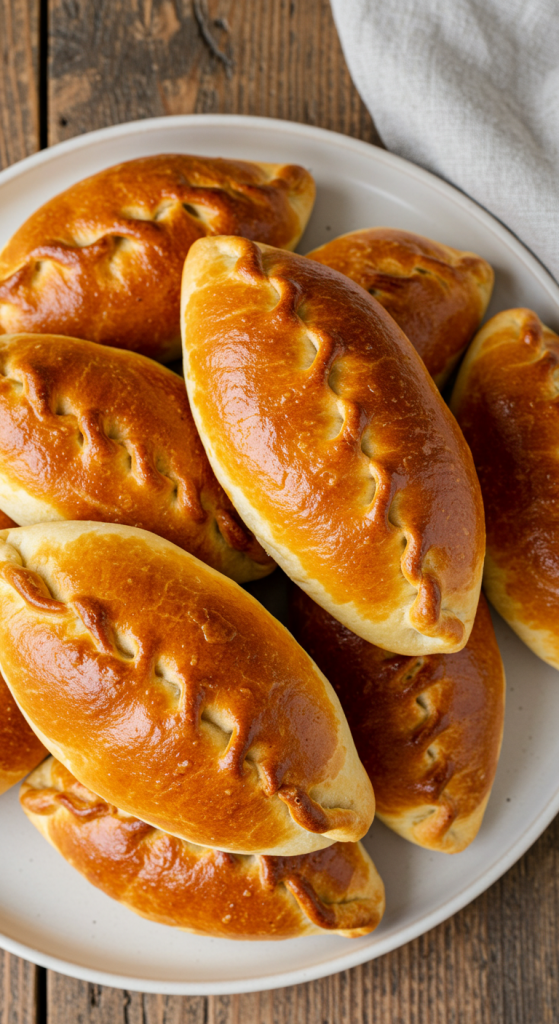
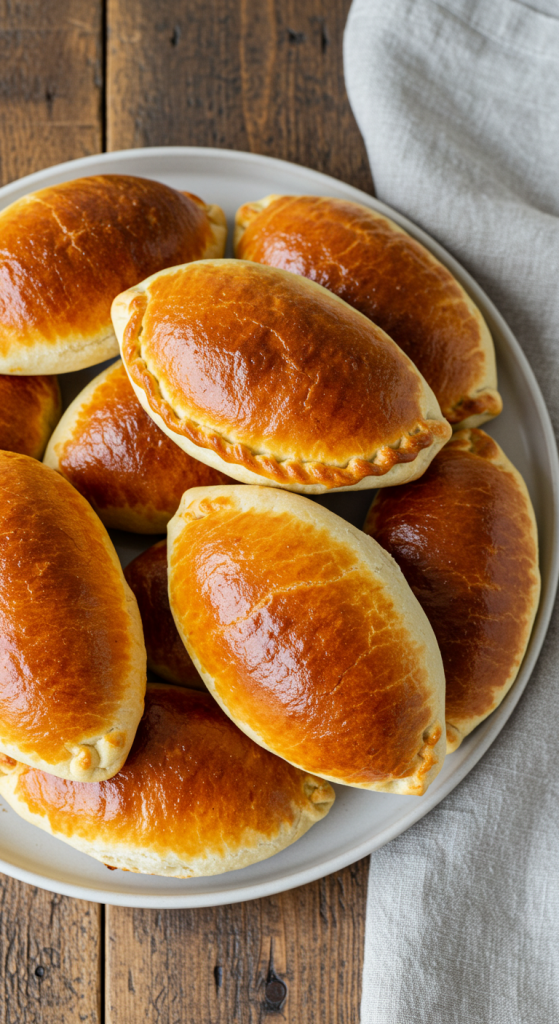
Punch down the dough and divide it into equal pieces. Roll each piece into a ball, then flatten slightly. Place a spoonful of filling in the center, fold the dough over, and pinch the edges to seal. Shape into ovals and place on a baking sheet.
Step 4: Bake to Perfection
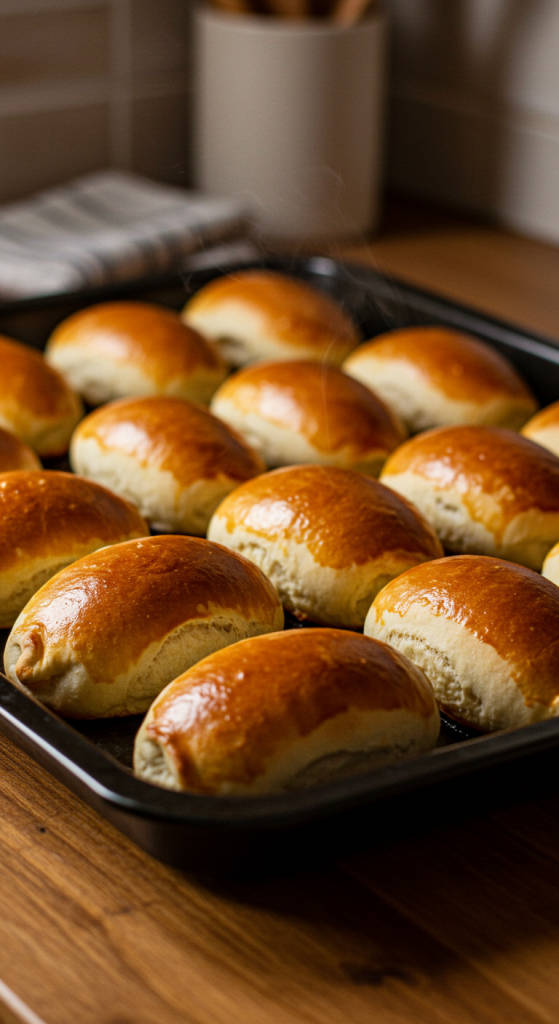
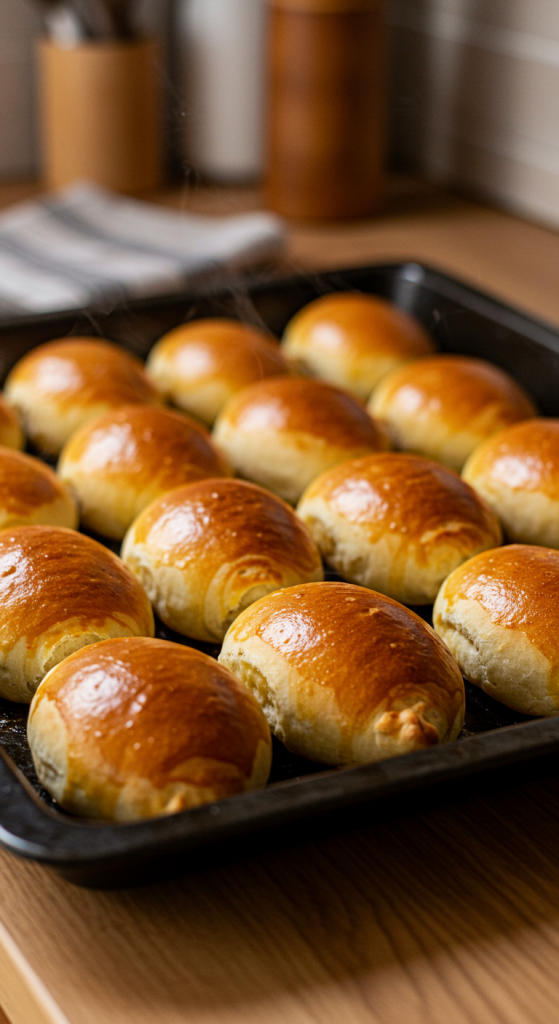
Brush each piroshki with beaten egg for a shiny, golden crust. Bake in a preheated oven until they are beautifully golden and cooked through. Serve warm and enjoy every bite!
Recipe Variations and Possible Substitutions
One of the joys of this piroshki recipe is its adaptability. You can swap ground beef for ground chicken, turkey, or even a vegetarian mushroom and potato filling. Cheese lovers can add shredded cheddar or mozzarella to the filling for a gooey surprise. You can also make sweet piroshki by filling them with fruit preserves, sweetened cream cheese, or even Nutella.
If you don’t have whole milk, feel free to use 2% milk or even a plant-based alternative like oat milk. Butter can be swapped with margarine in a pinch, though the flavor will be slightly different.
Serving and Pairing Suggestions
Piroshki are wonderfully versatile when it comes to serving. They’re perfect on their own as a snack or light meal, but I love serving them alongside a fresh green salad or a warm bowl of soup for a comforting dinner. A tangy tomato-based soup or a creamy mushroom soup pairs especially well. For a party platter, you can make mini piroshki and serve them as appetizers.

Storage and Reheating Tips
Piroshki store beautifully and are great for meal prep. Once cooled, you can store them in an airtight container at room temperature for up to 2 days. For longer storage, freeze them in a single layer on a baking sheet, then transfer to a freezer bag — they’ll keep for up to 3 months. To reheat, pop them in the oven at 350°F until warmed through, or microwave for a quick fix.
FAQs
What is the best filling for The Best Piroshki Recipe Ever?
The classic filling of seasoned ground beef and onions is my favorite, but feel free to experiment with mushrooms, potatoes, cheese, or even sweet fillings.
Can I make The Best Piroshki Recipe Ever ahead of time?
Yes, you can assemble and freeze the unbaked piroshki, then bake them straight from frozen. You may need to add a few extra minutes to the baking time.
How do I keep The Best Piroshki Recipe Ever soft and fluffy?
Make sure not to over-flour the dough and let it rise fully. Brushing with egg before baking also helps lock in moisture and gives that golden crust.
Can The Best Piroshki Recipe Ever be made vegan?
Absolutely — swap out the milk for plant-based milk, butter for vegan margarine, and use an egg substitute for the dough and brushing.
Related Recipe You’ll Like
If you’re as excited about cozy, satisfying dishes as I am, you’ll definitely want to try my Giant Zucchini Parmesan or the ever-popular Creamy Tuscan Sausage Pasta. Both are rich in flavor and perfect for weeknight dinners.
Save and Share This Recipe for Later
Don’t forget to pin this recipe for later on your Pinterest board so you can find it whenever the craving strikes. Share it with friends and family on Facebook or Instagram — and let them in on the magic of homemade piroshki. Every time someone asks you for the recipe, you’ll have it right at your fingertips to share!
The Best Piroshki Recipe Ever

This best piroshki recipe ever delivers soft, fluffy buns filled with savory seasoned beef and onion, all wrapped in a golden, slightly sweet dough. Perfect as a main dish, appetizer, or snack, these homemade piroshki are highly customizable, freezer-friendly, and bursting with authentic Eastern European flavor. A perfect addition to your recipe collection for anyone who loves hearty, comforting, and homemade meals.
Ingredients
- 4 cups All-purpose flour
- 2 1/4 tsp Active dry yeast
- 2 tbsp Sugar
- 1 tsp Salt
- 1 cup Whole milk
- 1/4 cup Butter
- 2 Eggs
- 1 lb Ground beef
- 1 medium Onion
- 2 cloves Garlic
- 1/2 tsp Black pepper
Instructions
- In a bowl, mix warm milk, sugar, and yeast. Let stand until foamy.
- Add eggs, melted butter, and salt. Gradually stir in flour until dough forms.
- Knead the dough for 8–10 minutes until smooth. Cover and let rise until doubled.
- Cook ground beef with chopped onion and garlic in a skillet. Season with salt and pepper. Let cool.
- Punch down dough, divide into 16 pieces. Flatten each and fill with a spoonful of beef filling. Seal and shape.
- Place piroshki on baking sheet, brush with beaten egg.
- Bake at 375°F for about 20 minutes until golden.
- Serve warm and enjoy!
Notes
Feel free to substitute the filling with mushrooms, potatoes, cheese, or even a sweet filling like jam. Piroshki can be frozen before or after baking.
Nutrition Information:
Yield:
16Serving Size:
1Amount Per Serving: Calories: 246Total Fat: 9gSaturated Fat: 4gTrans Fat: 0gUnsaturated Fat: 4gCholesterol: 58mgSodium: 211mgCarbohydrates: 27gFiber: 1gSugar: 3gProtein: 13g