Cotton Candy Cookies
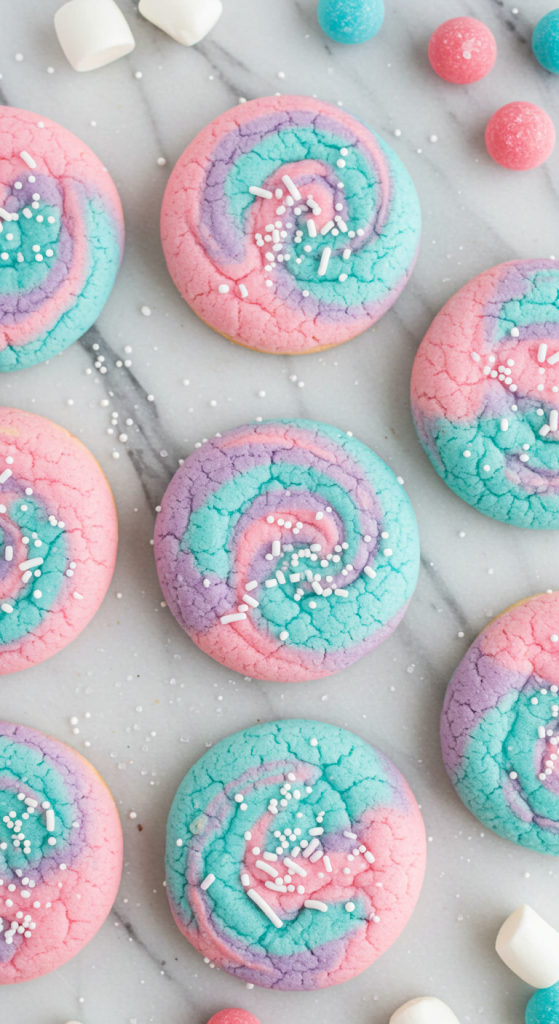
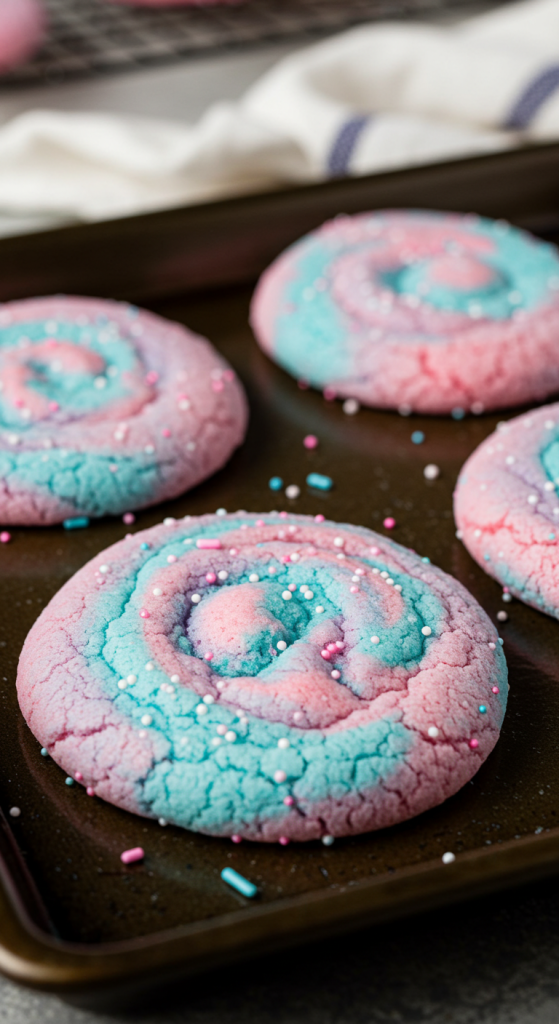
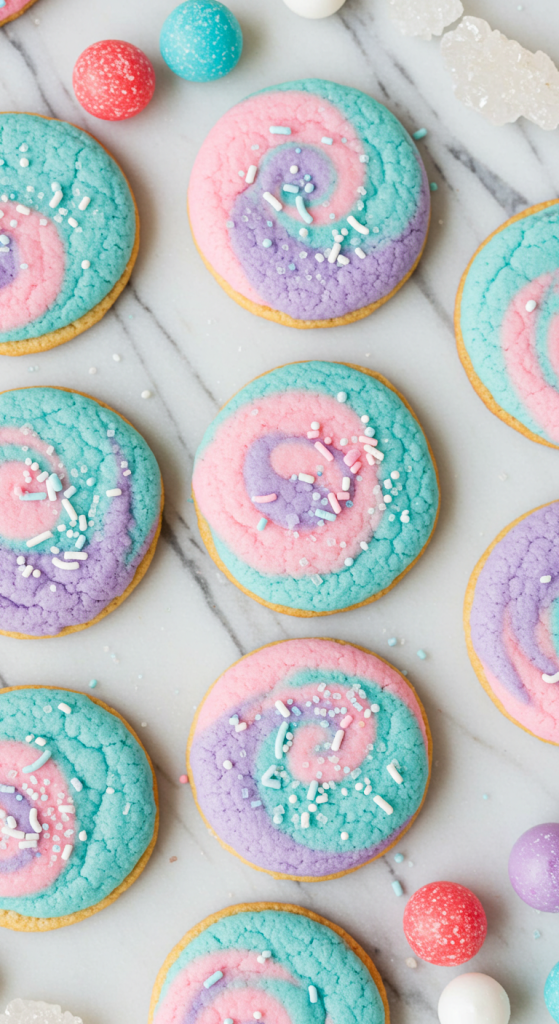
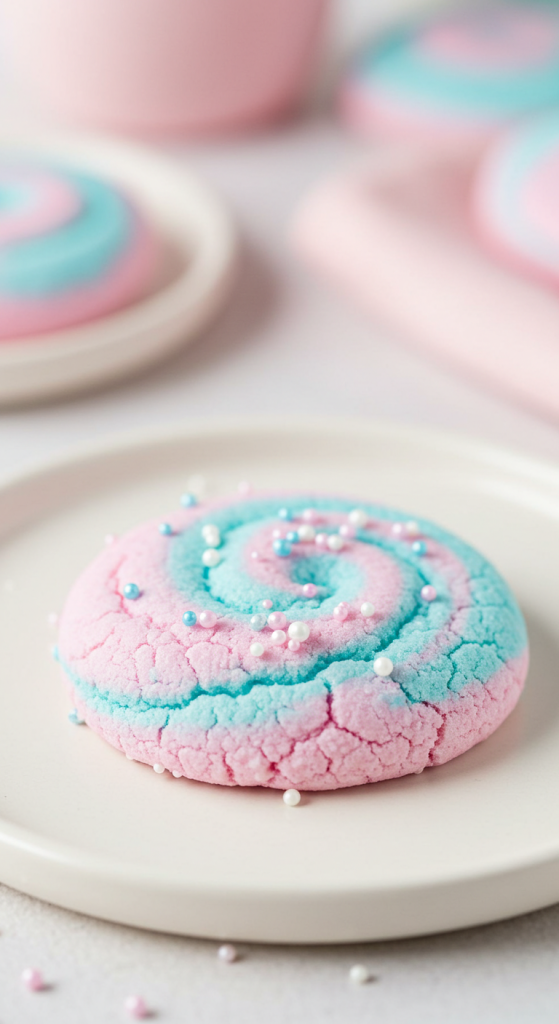
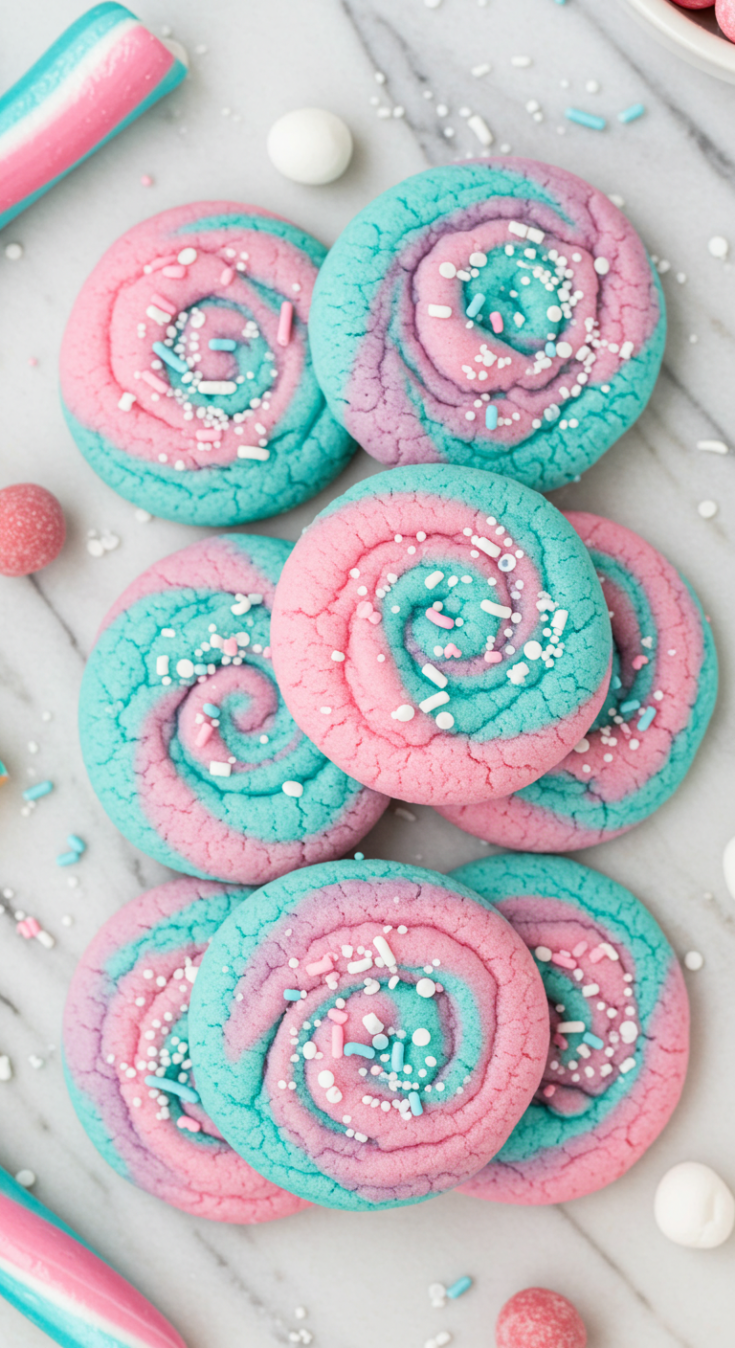
The moment I took the first bite of these Cotton Candy Cookies, I felt like I was transported to a whimsical carnival from my childhood. There’s something about the soft swirl of pastel pink, blue, and purple in each bite that brings instant joy. These cookies don’t just taste sweet; they feel sweet, inside and out.
I created this recipe for a birthday party where the theme was all about magic and fun, and let me tell you—these cookies were the star of the dessert table. With their chewy texture and buttery base, each cookie melts into a nostalgic burst of cotton candy flavor. Plus, they look absolutely stunning. I had so many guests ask me for the recipe that I knew it had to go on the blog.
What I especially love is how easy it is to make them. No fancy tools or difficult techniques required. Just simple steps that lead to a treat so special it instantly becomes the centerpiece of any celebration. Trust me, these are not your average sugar cookies—they’re a sweet daydream come true.


Why You’ll Love This Cotton Candy Cookies Recipe
These cookies are a visual treat with their dreamy, swirled colors and a delightfully soft, melt-in-your-mouth texture. They carry that classic cotton candy flavor, thanks to a touch of flavored extract, while still delivering the buttery richness of a sugar cookie. Whether you’re baking for a birthday party, baby shower, or just a fun afternoon with kids, these cookies bring smiles all around. Plus, they freeze beautifully, so you can keep a batch on hand for whenever the craving strikes.
Want more playful and colorful treats? You might also enjoy Sopapilla Cheesecake Bars, Cherry Chocolate Cheesecake, or Irrisistible Funnel Cake Bites.
How to Make Cotton Candy Cookies
Step 1: Prepare the dough
In a large bowl, cream together softened butter and granulated sugar until the mixture is light and fluffy. Add in the egg and cotton candy extract, mixing until combined. In a separate bowl, whisk together the flour, baking powder, and a pinch of salt. Slowly incorporate the dry ingredients into the butter mixture until a smooth dough forms.
Step 2: Divide and color
Divide the dough evenly into three bowls. Add a few drops of pink food coloring to one, blue to the second, and purple to the third. Stir each until the colors are fully blended. Chill the colored doughs in the refrigerator for 20-30 minutes.
Step 3: Swirl and shape
Once chilled, take a bit of each colored dough and gently press them together, rolling them into a ball. Flatten slightly and give a light twist to create that beautiful cotton candy swirl. Place on a lined baking sheet, spaced 2 inches apart.
Step 4: Bake and cool
Bake in a preheated oven at 350°F (175°C) for 10-12 minutes or until the edges are just set. Let them cool on the pan for a few minutes before transferring to a wire rack.
Recipe Variations and Possible Substitutions
You can substitute the cotton candy extract with vanilla or almond extract if you prefer a different flavor profile. For a more natural approach, use plant-based food coloring or skip it altogether for classic buttery sugar cookies. If you’re dairy-free, swap in plant-based butter and make sure your extract is vegan-friendly. You can also press in some white chocolate chips or rainbow sprinkles before baking for added texture and flair. These cookies are versatile enough to customize for different occasions—just change up the colors and flavors to suit your theme!
Serving and Pairing Suggestions
Cotton Candy Cookies are perfect on their own, but if you’re serving them at a party or celebration, consider pairing them with pastel-themed beverages like strawberry milk, blueberry lemonade, or even a cotton candy mocktail. They also make adorable party favors when packaged in cellophane bags tied with a ribbon. For a full dessert spread, serve them alongside cupcakes topped with cotton candy or a scoop of vanilla bean ice cream.

Storage and Reheating Tips
Store these cookies in an airtight container at room temperature for up to 5 days. They also freeze well; place cooled cookies in a single layer in a zip-top freezer bag and freeze for up to 2 months. To enjoy again, let them thaw at room temperature—no reheating required, though you can give them a quick 5-second zap in the microwave if you like them slightly warm and soft.
Frequently Asked Questions
How do I get the swirl effect in the cookies?
The swirl effect comes from lightly pressing and twisting together portions of the different colored doughs before baking. Be careful not to overmix, or the colors will muddy.
Can I use other extracts instead of cotton candy?
Yes! Vanilla, almond, or even strawberry extract can be used for different but equally delicious flavor profiles.
What kind of food coloring works best?
Gel food coloring is ideal because it produces vibrant colors without adding extra liquid to your dough.
Can I make the dough ahead of time?
Absolutely. You can make the dough up to 2 days in advance and store it wrapped in the fridge. Just let it sit out for 10 minutes before shaping.
Are these cookies good for decorating?
While they’re beautiful on their own, you can certainly decorate them further with edible glitter or drizzle a bit of white chocolate on top for extra flair.
Related Recipe You’ll Like
If you enjoyed these Cotton Candy Cookies, you’re going to fall in love with some of the other playful and sweet recipes on my site. Christmas Maraschino Cherry Shortbread Cookies are just as festive and colorful, perfect for the holidays or whenever you want a cherry burst of flavor. Looking for something nostalgic with a different twist? Try the Sopapilla Cheesecake Bars that are a hit at any gathering. And don’t miss the Irrisistible Funnel Cake Bites—they’re a crunchy, powdered sugar-coated trip to the fair without leaving your kitchen.
Save and Share This Cotton Candy Cookies Recipe for Later
If these cookies made your day a little sweeter, don’t forget to pin this recipe to your dessert or baking boards on Pinterest. You never know when you’ll need a batch of magical, pastel treats for a party or a special surprise. Also, share the love on Facebook, Instagram, or by sending this to a friend who needs a little sweetness today. Trust me, once they see those swirls, they’ll be asking for the recipe too!
Cotton Candy Cookies
These Cotton Candy Cookies are the ultimate sweet treat with their dreamy pastel swirls and buttery, melt-in-your-mouth texture. Infused with cotton candy flavor and colored in soft pink, blue, and purple, they bring fun and nostalgia to every bite. Perfect for parties, baby showers, or whenever you need a dose of whimsy, these cookies are easy to make and just as delightful to look at as they are to eat. They are ideal for gifting, sharing, or simply indulging in a bit of sugary magic.
Ingredients
- 1 cup unsalted butter, softened
- 1 cup granulated sugar
- 1 large egg
- 1 tsp cotton candy extract
- 2 1/2 cups all-purpose flour
- 1/2 tsp baking powder
- 1/4 tsp salt
- Gel food coloring: pink, blue, purple
- Sprinkles or edible glitter (optional)
Instructions
- Preheat oven to 350°F (175°C) and line a baking sheet with parchment paper.
- In a large bowl, cream butter and sugar until light and fluffy.
- Add egg and cotton candy extract. Mix until combined.
- In a separate bowl, whisk together flour, baking powder, and salt.
- Gradually add dry ingredients to wet mixture until a dough forms.
- Divide dough evenly into three bowls.
- Tint each portion with a different food color: pink, blue, and purple. Mix well.
- Chill dough for 20-30 minutes.
- Take a small piece from each colored dough and press together gently.
- Roll into a ball, slightly flatten, and twist gently to create a swirl.
- Place cookies on baking sheet about 2 inches apart.
- Bake for 10-12 minutes or until edges are just set.
- Let cool on pan for 5 minutes, then transfer to wire rack.
Notes
- Don’t overmix the colors to maintain the distinct swirl effect.
- Use gel coloring to avoid adding excess moisture.
- Store in an airtight container at room temperature for up to 5 days or freeze for up to 2 months.
- For extra sparkle, top with edible glitter or colored sprinkles before baking.